Hyundai Ioniq (AE): With Tire Mobility Kit (TMK) - Type B / Checking the tire inflation pressure
1. After driving approximately 4~6 miles (7~10 km or about 10 minutes), stop at a safe location.
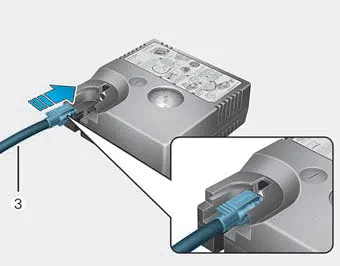
2. Connect the filling hose (3) directly into the compressor.
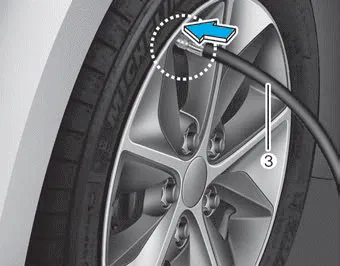
3. Connect the other end of the filling hose (3) directly into the tire valve.
4. Plug the compressor power cord (4) into the vehicle power outlet.
5. Adjust the tire inflation pressure to the recommended tire inflation. With
the ignition switched on, proceed as follows.
- To increase the inflation pressure: Switch on the compressor. To check the current
inflation pressure setting, briefly switch off the compressor.
- To reduce the inflation pressure: Press the button (9) on the compressor.
Information
The pressure gauge may show higher than actual reading when the compressor is running. To get an accurate tire pressure, the compressor needs to be turned off.
CAUTION
When you use the Tire Mobility Kit including sealant not approved by HYUNDAI, the tire pressure sensors may be damaged by sealant. The sealant on the tire pressure sensor and wheel should be removed when you replace the tire with a new one and inspect the tire pressure sensors at an authorized dealer.
WARNING
The tire inflation pressure must be at least 32 psi (220 kPa). If it is not, do not continue driving. Call for road side service or towing.
Information
When reinstalling the repaired or replaced tire and wheel on the vehicle, tighten the wheel lug nut to 79~94 lbf·ft (11~13 kgf·m).
CAUTION Detach the speed restriction label (1) from the sealant bottle (2), and place it in a highly visible place inside the vehicle such as on the steering wheel to remind the driver not to drive too fast.
Towing Service If emergency towing is necessary, we recommend having it done by an authorized HYUNDAI dealer or a commercial tow-truck service. Proper lifting and towing procedures are necessary to prevent damage to the vehicle.
Other information:
Hyundai Ioniq (AE) 2017-2022 Service & Repair Manual: Description and operation
DescriptionIn ordinary cars, the mechanical water pump mounted on the engine for heating purposes is activated to circulate the cooling water, but in hybrid cars, AEWP is used to circulate the cooling water when the engine is not operating. Classification System Cooling water used
Hyundai Ioniq (AE) 2017-2022 Service & Repair Manual: Schematic diagrams
System Block DiagramComponent Parts and Function Outline Component part Function Vehicle-speed sensor, ESP/ABS Control ModuleConverts vehicle speed to pulse.VCUReceives signals from sensor and control switches.
Categories
- Manuals Home
- Hyundai Ioniq Owners Manual
- Hyundai Ioniq Service Manual
- Jump Starting
- Jump starting procedure
- Body (Interior and Exterior)
- New on site
- Most important about car
