Hyundai Ioniq: Parking Brake System / Parking Brake Cable. Repair procedures
Hyundai Ioniq (AE) 2017-2025 Service Manual / Brake System / Parking Brake System / Parking Brake Cable. Repair procedures
| Removal |
| 1. | Disconnect the negative (-) battery cable. |
| 2. | Release the parking brake. |
| 3. | Remove the crash pad lower panel. (Refer to Body - "Crash Pad") |
| 4. | Remove the parking brake cable adjusting nut (A) and the fixing clip (B), and then remove the parking cable from the brake pedal.
|
| 5. | Loosen the parking brake cable bracket bolt (A).
|
| 6. | Remove the floor console assembly. (Refer to Body - "Floor Console") |
| 7. | Loosen the parking brake cable bracket bolt.
|
| 8. | Loosen the parking brake cable bracket bolt and then remove the parking cable from the Equalizer assembly (A).
|
| 9. | Loosen the wheel nuts slightly. Raise the vehicle, and make sure it is securely supported. |
| 10. | Remove the rear wheel and tire (A) from rear hub.
|
| 11. | Remove the parking brake cable fixed clip (A).
|
| 12. | Pull the operating lever as a direction of arrow in the illustration below and then remove the parking brake cable.
|
| 13. | Remove the under cover.
|
| 14. | Loosen the parking brake cable bracket bolts and them remove the parking cable.
|
| 15. | To install, reverse the removal procedure. |
| 16. | Perform the rear disc brake adjustment. (Refer to Parking Brake Cable - "Adfustment") |
| 17. | Adjust the parking brake pedal stroke.
|
| Adjustment |
Rear Disc Brake Type
|
| 1. | Remove the floor console to reach the adjusting nut. |
| 2. | Loosen the parking brake cable until both operating levers rest in fully off position. |
| 3. | Bring the brake pads in their operating position by pressing the brake pedal down several times until there is resistance. |
| 4. | Tension the parking brake cable by tightening the adjusting nut, until the operating levers on both calipers lift from the stop, up to a distance of (A) and (D) between operating lever (B) and stopper (C).
|
| 5. | Refit the floor console. |
| 6. | Parking brake lever in the car must be in fully loosened position. |
| 7. | If the handbrake cables where changed, actuate the parking brake a few times with maximum force to stretch the parking brake cables, and then control adjusting as above. |
| 8. | Check the wheels of their free operation. |
| 9. | Test drive. |
Rear Drum Brake Type
| 1. | Depress the brake pedal several times to set the self-adjusting brake.
|
 Parking Brake Switch. Repair procedures
Removal1.Disconnect the negative (-) battery cable.2.Remove the crash pad lower panel.(Refer toBody - "Crash Pad")3.Remove the junction box.(Refer to Body Electrical System - "Fuses and Relays")4...
 Electric Parking Brake (EPB). Description and operation
DescriptionThe EPB is an electronic parking brake. The EPB is different from existing parking systems which operated with the brake pedal or the lever type...
Categories
- Manuals Home
- 1st Generation Ioniq Owners Manual
- 1st Generation Ioniq Service Manual
- Hybrid battery SOC (State of Charge) gauge
- Towing
- High Beam Assist (HBA)
- New on site
- Most important about car
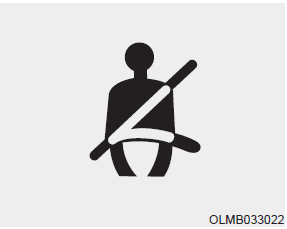
Seat Belt Warning Light
Seat belt warning light

As a reminder to the driver, the seat belt warning light will illuminate and warning chime will sound for approximately 6 seconds each time you place the Engine Start/Stop button to the ON position if the seat belt is unfastened.
Copyright © 2025 www.hioniqae.com


