Hyundai Ioniq: Airbag Module / Driver Airbag (DAB) Module and Clock Spring. Repair procedures
Hyundai Ioniq (AE) 2017-2025 Service Manual / Restraint / Airbag Module / Driver Airbag (DAB) Module and Clock Spring. Repair procedures
| Removal |
| 1. | Disconnect the battery negative cable and wait for at least three minutes before beginning work. |
| 2. | Remove the driver airbag module by putting in a flat tool (Ø5mm) into the guide hole and then press the spring.
|
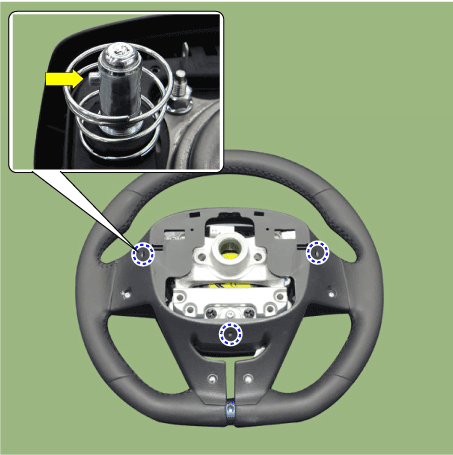
| 3. | Release the connector locking pin, then disconnect the driver airbag module connector (A) and horn connector (B).
|


| 4. | Remove the steering wheel. (Refer to Steering System - "Steering Wheel") |
| 5. | Remove the Steering Column Shroud Panel. (Refer to Body - "Steering Column Shroud Panel") |
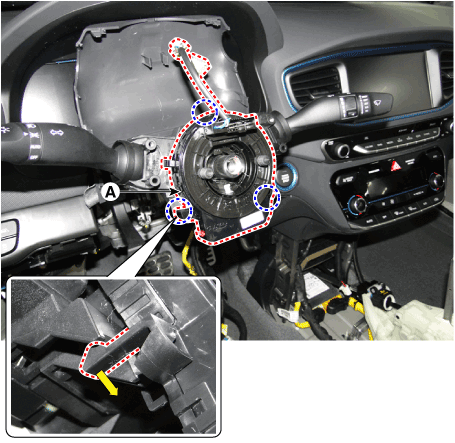
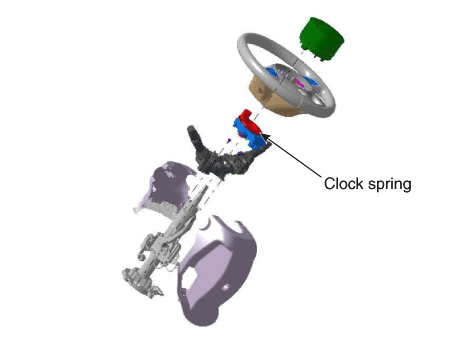
| 6. | Remove the clock spring (A) after disconnecting the clock spring connectors (B).
|
| Inspection |
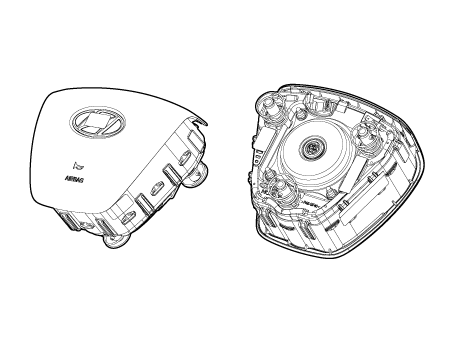
Driver Airbag (DAB)
If any improper parts are found during the following inspection, replace the airbag module with a new one.
|
| 1. | Check pad cover for dents, cracks or deformities. |
| 2. | Check the airbag module for denting, cracking or deformation. |
| 3. | Check hooks and connectors for damage, terminals for deformities, and harness for binds. |
| 4. | Check airbag inflator case for dents, cracks or deformities.
|
| 5. | Install the airbag module to the steering wheel to check for fit or alignment with the wheel. |
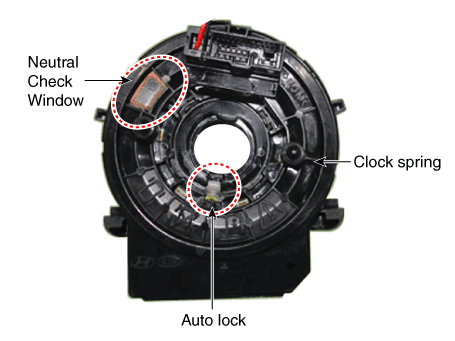
Clock Spring
| 1. | If, as a result of the following checks, even one abnormal point is discovered, replace the clock spring with a new one. |
| 2. | Check connectors and protective tube for damage, and terminals for deformities.
|
| Installation |
| 1. | Set the front tires straight-ahead. |
| 2. | Turn the ignition switch OFF. |
| 3. | Disconnect the battery negative cable from the battery and wait for at least three minutes before beginning the work. |
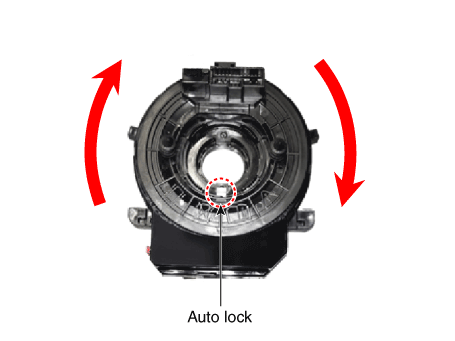
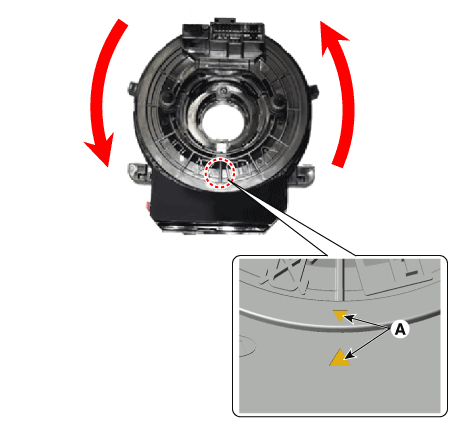
| 4. | Assemble the neutral state clock spring.
[Clock Spring Manual Neutral Setting Procedure]
|

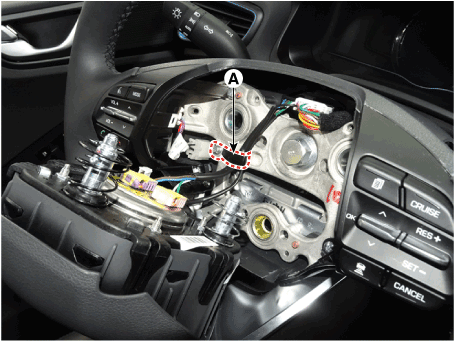
| 5. | Install the steering wheel column shroud and the steering wheel (Refer to Steering System - "Steering Column and Shaft") |
| 6. | Connect the Driver Airbag (DAB) module connector and horn connector, and then install the Driver Airbag (DAB) module on the steering wheel.
|
| 7. | Connect the battery negative cable. |
| 8. | After installing the airbag, confirm proper system operation :
|

 Passenger Airbag (PAB) Module. Description and operation
DescriptionThe passenger airbag (PAB) is installed inside the crash pad and protects the front passenger in the event of a frontal crash. The SRSCM determines if and when to deploy the PAB...
Other information:
Hyundai Ioniq (AE) 2017-2025 Owner's Manual: Rear Seat Belt – Passenger's 3- point system with convertible locking retractor
This type of seat belt combines the features of both an emergency locking retractor seat belt and an automatic locking retractor seat belt. Convertible retractor type seat belts are installed in the rear seat positions to help accommodate the installation of child restraint systems...
Hyundai Ioniq (AE) 2017-2025 Service Manual: Description and operation
DescriptionThe Dual Clutch Transmission (DCT) control system measures required data to identify the state of the control target and computes the appropriate compensation value if adjustment is necessary. The actuator is controlled according to the computed compensation value to obtain desired output...
Categories
- Manuals Home
- 1st Generation Ioniq Owners Manual
- 1st Generation Ioniq Service Manual
- Checking the Coolant Level
- Towing
- Smart Cruise Control System
- New on site
- Most important about car
Side view mirror control
Adjusting the side mirrors:
1. Press either the L (driver's side) or R (passenger's side) button (1) to select the side view mirror you would like to adjust.

Copyright © 2025 www.hioniqae.com