Hyundai Ioniq: Windshield Wiper/Washer / Front Wiper Motor. Repair procedures
Hyundai Ioniq (AE) 2017-2025 Service Manual / Body Electrical System / Windshield Wiper/Washer / Front Wiper Motor. Repair procedures
| Removal |
| 1. | Disconnect the negative (-) battery terminal. |
| 2. | If necessary, release the wiper blade fixing clip by pulling up and remove the wiper blade from the inside radius of wiper arm.
|
| 3. | Remove the cowl top cover. (Refer to Body - "Cowl Top Cover") |
| 4. | Disconnect the windshield deicer connector (B) after loosening the wiper moter assembly mounting bolts (A).
|
| 5. | Hold the wiper motor crank arm and remove the upper linkage (A).
|
| 6. | Hold the wiper motor crank arm and remove the upper linkage (A).
|

| 7. | Remove the lower linkage (A) from the wiper motor crank arm.
|
| 8. | Remove the crank arm (A) after loosening a nut (B). |
| 9. | Remove the wiper motor (A) after loosening the bolts.
|
| Installation |
| 1. | Install the wiper motor. |
| 2. | Install the crank arm.
|
| 3. | Install the lower and upper linkage to the wiper motor crank arm. |
| 4. | Install the wiper motor and linkage assembly and then connect the wiper motor connector.
|
| 5. | Install the cowl top cover. |
| 6. | Install the windshield wiper arm and blade.
|

| 7. | Install the wiper arm and blade to the specified position. A: Auto stop position (Blade)
|
| Inspection |
| 1. | Remove the connector (A) from the wiper motor.
|
| 2. | Attach the positive (+) lead from the battery to terminal 3 and the negative (-) lead to terminal 5.
|
| Inspection (with GDS) |
| 1. | The wiring harness system on the body can check the failed parts more rapidly with tester for the vehicle (GDS). The tester (GDS) provides the following information.
|
| 2. | Select the "Car Model" and the system to be checked in order to check the vehicle with the tester. |
| 3. | Select the module to be checked after selecting BCM.
|
| 4. | Select the "Input/Output monitoring" menu to search the current state of the input/output data. The input/output data for the sensors corresponding to the "Instrument Panel Module (IPM)" can be checked.
|

 Front Washer Motor. Repair procedures
InspectionFront Washer Motor1.With the washer motor connected to the reservoir tank, fill the reservoir tank with water.
•
Before filling the reservoir tank with water, check the filter for foreign material or contamination...
Other information:
Hyundai Ioniq (AE) 2017-2025 Service Manual: Head Lamp Leveling Switch. Repair procedures
Inspection1.Disconnect the negative (-) battery terminal.2.Remove the crash pad lower panel (A).(Refer to Body - "Crash Pad Lower Panel")3.Disconnect the rheostat switch connector (A).4.Operate the BSD switch, then check for continuity between terminals of BSD switch connector...
Hyundai Ioniq (AE) 2017-2025 Service Manual: Description and operation
Description• Components location : DCT (Dual Clutch Transmission)• Function The input shaft speed sensor is important in that it detects the input shaft RPM and sends this information to the Transmission Control Module (TCM)...
Categories
- Manuals Home
- 1st Generation Ioniq Owners Manual
- 1st Generation Ioniq Service Manual
- Tilt Steering / Telescope Steering
- Checking the Coolant Level
- Coasting Guide (Plug-in hybrid vehicle)
- New on site
- Most important about car
Seatback pocket
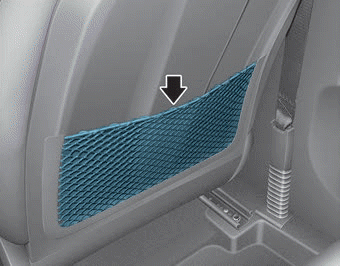
The seatback pocket is provided on the back of the front passenger's seatback.
WARNING
To prevent the Occupant Classification System from malfunctioning:

Copyright © 2025 www.hioniqae.com