Hyundai Ioniq: Motor Driven Power Steering / MDPS Motor. Repair procedures
| •
| When a DTC related to MDPS motor occurs, check the connectors and wiring. If no problem is found, replace the motor. |
|
| •
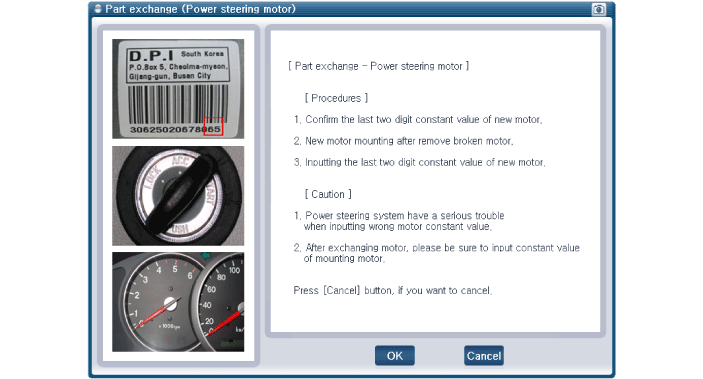
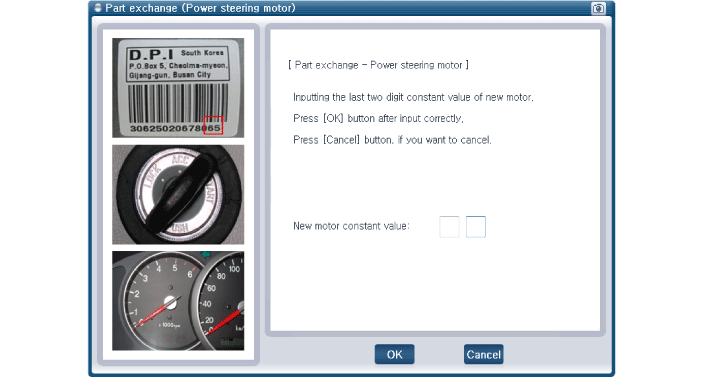
| Be sure to check the last two digits of the constant in the barcode of new MDPS motor before replacing the motor. |
| •
| Entering incorrect motor constant value may cause a serious problem in the MDPS. |
|
| 1. | Disconnect the battery negative cable from the battery and then wait for at least 30 seconds. |
| 2. | Turn the steering wheel so that the front wheels are placed in the straight ahead position. |
| 3. | Remove the steering column shroud lower panel. (Refer to Body - "Steering Column Shroud Panel") |
| 4. | Remove the crash pad lower panel. (Refer to Body - "Crash pad lower panel") |
| 5. | Remove the knee airbag (KAB) module. (Refer to Restraint - "Knee Airbag (KAB) Module") |
| 6. | Remove the fixed clip (A) from the steering column. 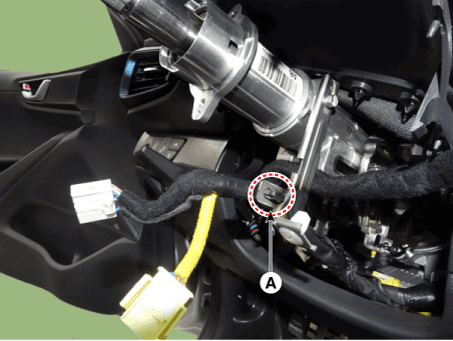
|
| 7. | Disconnect the MDPS ECU connectors (A). 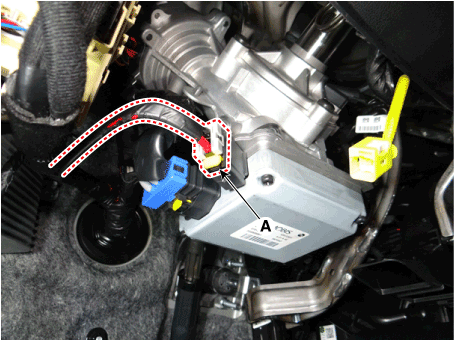
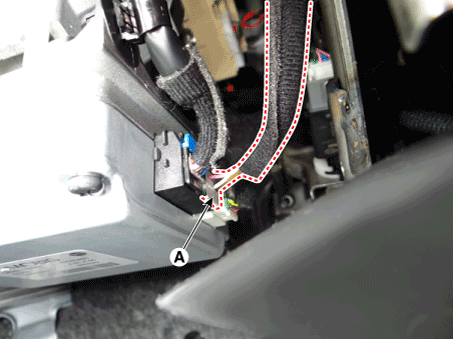
|
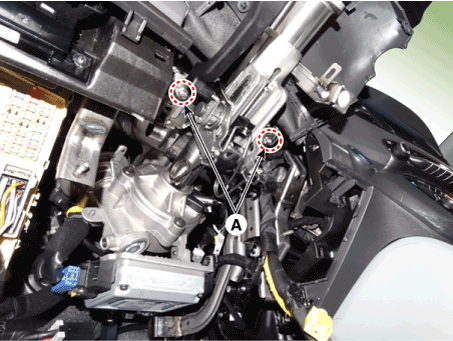
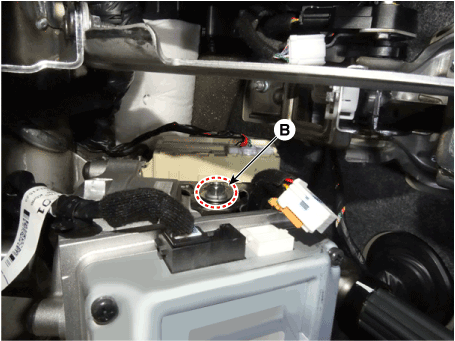
| 8. | Remove the steering column & EPS unit assembly by loosening the mounting bolt (B) and nuts (A). Tightening torque Nut : 25.0 - 29.4 N.m (2.5 - 3.0 kgf.m, 14.5 - 21.7 lb-ft) Bolt : 44.1 - 49.0 N.m (4.5 - 5.0 kgf.m, 32.5 - 36.2 lb-ft) |
|
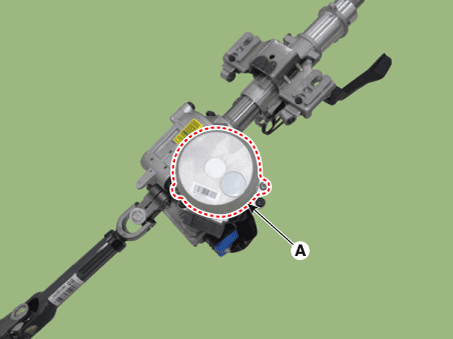
| 9. | Remove the motor (A) by loosening the bolts and then replace the new one. Tightening torque : 7.8 - 11.8 N·m (0.8 - 1.2 kgf·m, 5.8 - 8.7 lb·ft) |
|
| 10. | Install in the reverse order of removal. |
| 11. | Perform the "Inputting the motor constant value" by GDS following in the order below. | (1) | Connect self-diagnosis connector(16pins) located in the lower of driver side crash pad to self-diagnosis device. |
| (2) | Turn the self-diagnosis device after key is ON. |
| (3) | Select the "vehicle model" and "EPS system" on GDS vehicle selection screen. |
| (4) | Select the "Part exchange(Power steering Motor)". 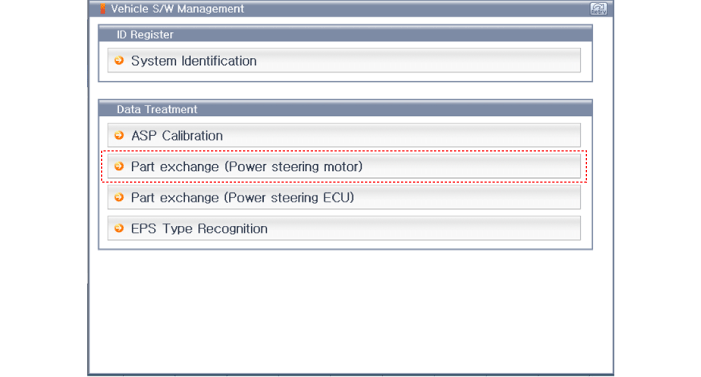
|
| (5) | Select the "Part exchange(Power steering Motor)". 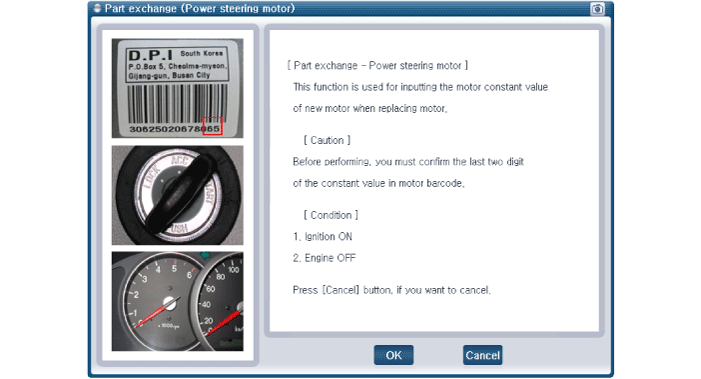
| •
| Entering incorrect motor constant value may cause a serious problem in the MDPS. |
|
|
|
| 12. | Conduct the "ASP Calibration" by GDS. (Refer to MDPS Motor- "Diagnosis with GDS") |
| 13. | Remove the DTC and then perform the Conduct the "MDPS TEST (Motor Driven Power Steering)" by GDS. (Refer to Motor Driven Power Steering - "MDPS Performance Inspection") |
| 14. | Turn off the IGN switch and wait for 10 seconds or more. Then check the operation after starting the engine. |
| –
| Steering-angle sensor detects the steering angle and steering angle speed. Steering angle and steering angle speed are used for steering wheel damping and return controls in addition to providing assistance torque. |
| •
| You can use a scan tool to(GDS) check if the battery voltage is proper before perform the "ASP Calibration". |
| •
| Make sure that no connector engaged to the vehicle or scan tool is disconnected during the "ASP Calibration". |
| •
| Once the "ASP Calibration" is complete, turn off the IG switch and wait for 10 seconds or more before starting the engine to check the operation. |
|
ASP Calibration procedures
| 1. | Connect self-diagnosis connector(16pins) located in the lower of driver side crash pad to self-diagnosis device. |
| 2. | Turn the self-diagnosis device after key is ON. |
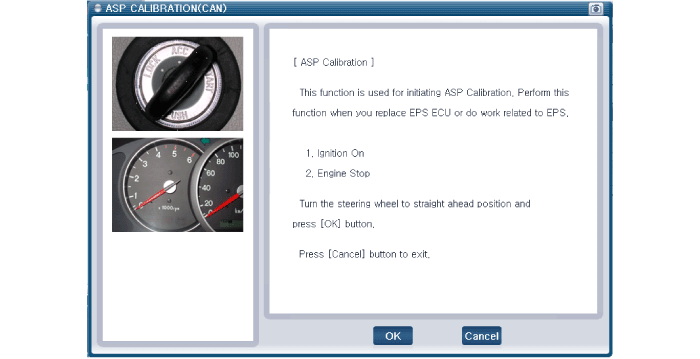
| 3. | Turn the steering wheel to straight ahead position. |
| 4. | After Selecting the "vehicle model" and "system", select the "ASP Calibration" on GDS vehicle selection screen. 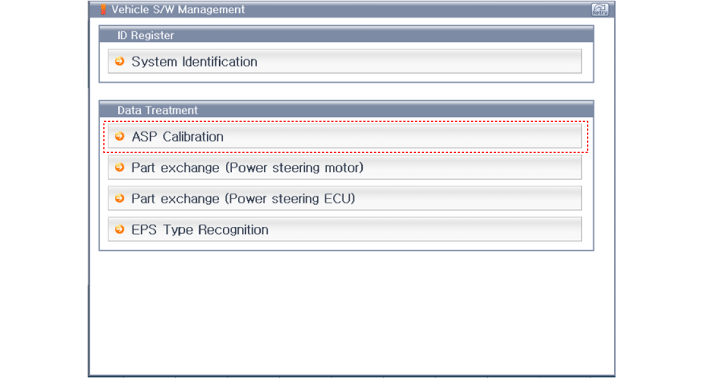
|
| 6. | Turn off the IG switch and wait for 10 seconds or more before starting the engine. And then make sure that MDPS works properly. |
A/S Repair produresMDPS System A/S Workflow① Noise / malfunction Inspection② Warning lamp (DTC) / CAN Line error2 - 1 Checking Connectors and Wiring1...
Replacement
•
If a DTC occurs in the ECU, check the connectors and wiring. If no problem is found, replace the ECU...
Other information:
1. After driving approximately 4~6 miles (7~10 km or about 10 minutes), stop
at a safe location.
2. Connect the filling hose (3) directly into the compressor.
3. Connect the other end of the filling hose (3) directly into the tire valve.
4. Plug the compressor power cord (4) into the vehicle power outlet...
SpecificationsHybrid motor
Drive motor
Category
Drive motor
TypePermanent magnet synchronous motor(Interior Permanent Magnet Synchronous Motor)Maximum output32kW (driving), 35kW (regeneration)Maximum torque170 N...
Categories
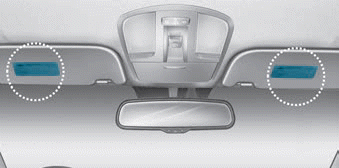
Air bag warning labels, required by the U.S. National Highway Traffic Safety
Administration (NHTSA), are attached to alert the driver and passengers of potential
risks of the air bag system. Be sure to read all of the information about the air
bags that are installed on your vehicle in this Owners Manual.
read more
 Repair procedures
 MDPS Control Unit. Repair procedures


