Hyundai Ioniq: Roof Trim / Roof Trim Assembly. Repair procedures
Hyundai Ioniq (AE) 2017-2025 Service Manual / Body (Interior and Exterior) / Roof Trim / Roof Trim Assembly. Repair procedures
| Replacement |
|

|

| 1. | Remove the front seat. (Refer to Front Seat - "Front Seat Assembly") |
| 2. | Remove the rear seat. (Refer to Rear Seat - "Rear Seat Assembly") |
| 3. | Remove the front pillar trim. (Rear to Interior Trim - "Front Pillar Trim") |
| 4. | Remove the canter pillar lower trim. (Rear to Interior Trim - "Center Pillar Trim") |
| 5. | Remove the canter pillar upper trim. (Rear to Interior Trim - "Center Pillar Trim") |
| 6. | Remove the rear pillar trim. (Rear to Interior Trim - "Rear Pillar Trim") |
| 7. | Remove the sunvisor and retainer. (Rear to Roof Trim - "Sunvisor") |
| 8. | Remove the assist handle. (Rear to Roof Trim - "Assist Handle") |
| 9. | Remove the overhead console lamp. (Rear to Body Electrical System - "Overhead Console Lamp") |
| 10. | Remove the room lamp. (Rear to Body Electrical System - "Room Lamp") |
| 11. | Disconnect the ECM mirror connector. (Refer to Body Electrical System - "Electro Chromic Inside Rear View Mirror") |
| 12. | Disconnect the rain sensor connector. (Refer to Body Electrical System - "Rain Sensor") |
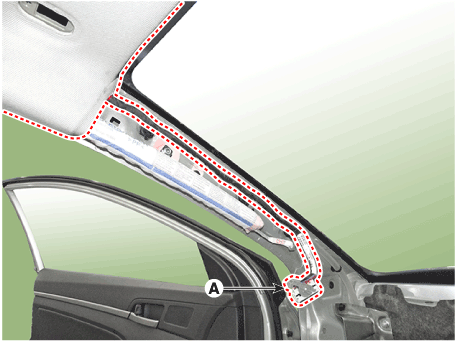
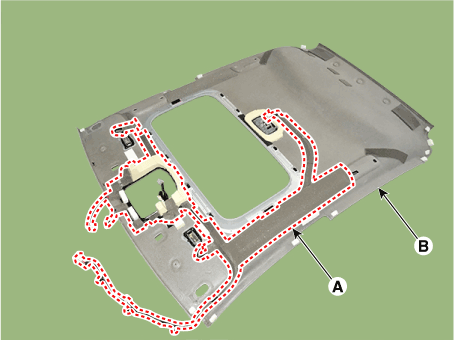
| 13. | Disconnect the roof trim main connector (A) and the mounting clips in the front pillar.
|
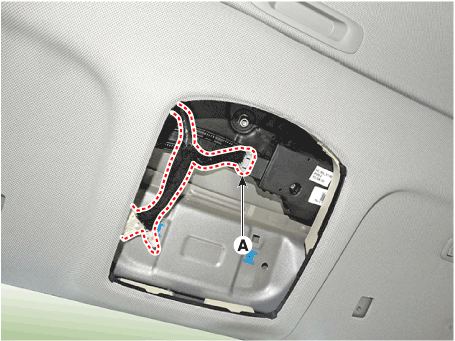
| 14. | Disconnect the sunroof motor connector (A).
|
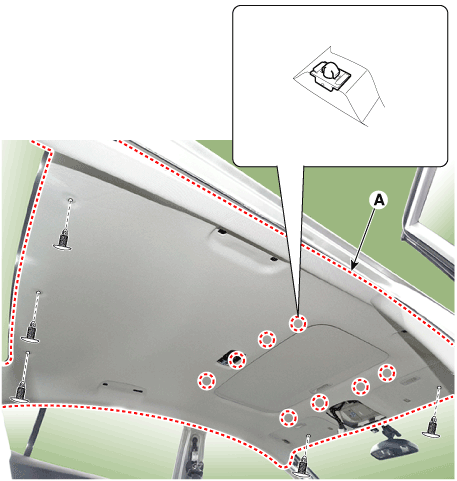
| 15. | Remove the roof trim mounting clip and remove the roof trim assembly (A).
|
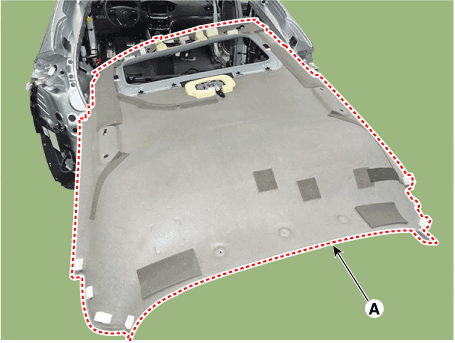
| 16. | Remove the roof trim assembly (A) from the body panel and then carry it out of the vehicle through the rear door.
|
| 17. | Remove the vanity lamp. (Refer to Body Electrical - "Vanity Lamp') |
| 18. | Remove roof trim wiring harness (A) from the roof trim (B).
|

| 19. | To install, reverse the removal procedure.
|


Other information:
Hyundai Ioniq (AE) 2017-2025 Service Manual: Description and operation
DescriptionThe high voltage battery system consists of the BMS ECU (Battery Management System ECU), Power Relay Assembly (PRA), safety plug, battery temperature sensor, and battery ambient sensor. Especially the BMS ECU controls SOC (State Of Charge), power, cell balancing, cooling and troubleshooting of the high voltage battery system...
Hyundai Ioniq (AE) 2017-2025 Service Manual: Repair procedures
Removal1.Turn ignition switch OFF and disconnect the battery negative (-) terminal.2.Remove the engine room under cover.(Refer to Engine Mechanical System - "Engine Room Under Cover")3.Disconnect the clutch actuator connector (A).4.Remove the fork cover (A)...
Categories
- Manuals Home
- 1st Generation Ioniq Owners Manual
- 1st Generation Ioniq Service Manual
- Jump Starting
- Check Hybrid system, Check Hybrid system. Turn engine Off
- How to Disconnect Normal Charger
- New on site
- Most important about car
Seatback pocket
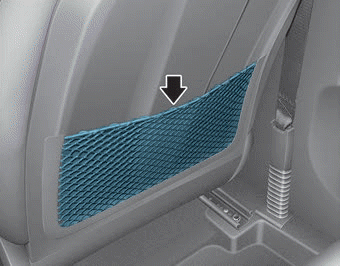
The seatback pocket is provided on the back of the front passenger's seatback.
WARNING
To prevent the Occupant Classification System from malfunctioning:

Copyright © 2025 www.hioniqae.com