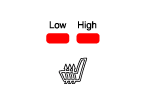
Hyundai Ioniq: Seat Electrical / Seat Heater. Repair procedures
Front Seat Heater
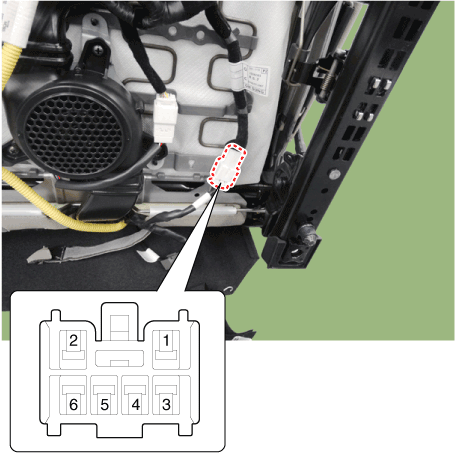
1. | Check for continuity and measure the resistance between terminals No 3 and No 6. Standard value Driver / Assists (cushion + back) : 1.93Ω±10%/23°C |
|
2. | Operate the seat heater after connecting the connector, and then check the thermostat by measuring the temperature of seat surface. Standard value 1st : cushion : 36±2°C, back : 40±2°C 2st : cushion : 39±2°C, back : 45±2°C 3st : cushion : 42±2°C, back : 50±2°C |
|
Rear Seat Heater
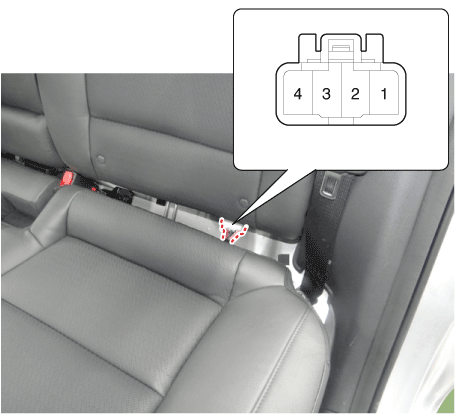
1. | Check for continuity and measure the resistance between terminals No 1 and No 4. Standard value Rear seat : 3.16Ω±10%/20°C |
|
2. | Operate the seat heater after connecting the connector, and then check the thermostat by measuring the temperature of seat surface. Standard value High (Cushion) : 38±2°C Low (Cushion) : 42±2°C |
|
Seat Heater Unit Diagnosis Mode
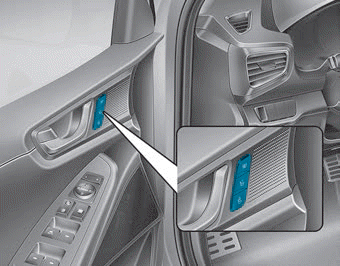
1. | You can enter the diagnosis mode by turning the seat heater button on. |
2. | You can enter the diagnosis mode by referring to following description. •
| Push IGN ON while pressing the seat heater button from IGN OFF. |
•
| Keep pressing IGN ON for more than three seconds before pressing it once againe for more than three seconds within 2 seconds. |
•
| All LED indicators on the driver and passenger seat button will blink 1 times. |
|
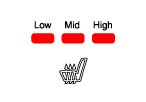
3. | After entering the diagnosis mode, you can check what failed by checking the blinking LED. [Driver / Passenger Seat Heater]
Failure Indicator
| Inspection Items
| Detailed Inspections
| Low : OFF Mid : OFF High : FLASHING
| Low voltage detection
| –
| IGN1 voltage of 8.5 V or lower |
| Over voltage detection
| –
| IGN1 voltage of 16.5 V or lower |
| Low : FLASHING Mid : FLASHING High : FLASHING
| Fuse (Short)
| –
| Disconnection or missing connector of heating seat B(+) line |
| Low : OFF Mid : ON High : FLASHING
| NTC (Short / Disconnector)
| –
| Short-circuit between NTC connector terminals |
–
| Disconnection in the NTC (+) wiring |
–
| Disconnection in the NTC (-) wiring |
| Low : FLASHING Mid : FLASHING High : FLASHING
| Heater (Short / Disconnector)
| –
| Heating wire element failure |
–
| Short-circuit between heating wire connector terminals |
–
| Disconnection in the heating wire (+) |
–
| Disconnection in the heating wire (-) |
| Low : ON Mid : ON High : FLASHING
| Loss of temperature feedback
| –
| Target temperature not reached within 40 minutes |
|
[Rear Seat Heater]
Failure Indicator
| Inspection Items
| Detailed Inspections
| Low : OFF High : OFF
| Low voltage detection
| –
| IGN1 voltage of 8.5 V or lower |
| Over voltage detection
| –
| IGN1 voltage of 16.5 V or lower |
| Low : FLASHING High : FLASHING
| Fuse (Short)
| –
| Disconnection or missing connector of heating seat B(+) line |
| Low : OFF High : FLASHING
| NTC (Short / Disconnector)
| –
| Short-circuit between NTC connector terminals |
–
| Disconnection in the NTC (+) wiring |
–
| Disconnection in the NTC (-) wiring |
| Low : FLASHING High : FLASHING
| Heater (Short / Disconnector)
| –
| Heating wire element failure |
–
| Short-circuit between heating wire connector terminals |
–
| Disconnection in the heating wire (+) |
–
| Disconnection in the heating wire (-) |
| Low : ON High : FLASHING
| Loss of temperature feedback
| –
| Target temperature not reached within 40 minutes |
|
|
4. | You can check the malfunctioning by checking the blinking LED. |
5. | Pressing the IGN OFF button will end the diagnosis mode for the heater seat. |
6. | You can check whether the heating seat system works properly after turning the IGN ON. If you want to check the error code, you can refer to the procedure of 2 above. |
Other information:
The USB charger is located inside the console box between the driver's seat and
the front passenger's seat.
Insert the USB charger into the USB port, and re-charge a smart phone or a tablet
PC.
A charging status/charging completion message will be displayed on the screen
of your device...
To install a LATCH-compatible child restraint in either of the rear outboard
seating positions:
1. Move the seat belt buckle away from the lower anchors.
2. Move any other objects away from the anchors that could prevent a secure connection
between the child restraint and the lower anchors...
Categories
The Driver Position Memory System is provided to store and recall the following
memory settings with a simple button operation.
- Driver's seat position
- Side view mirror position
- Instrument panel illumination intensity
read more