Hyundai Ioniq: Crash Pad / Crash Pad Garnish. Repair procedures
Hyundai Ioniq (AE) 2017-2025 Service Manual / Body (Interior and Exterior) / Crash Pad / Crash Pad Garnish. Repair procedures
| Replacement |
[Crash pad center garnish]
|
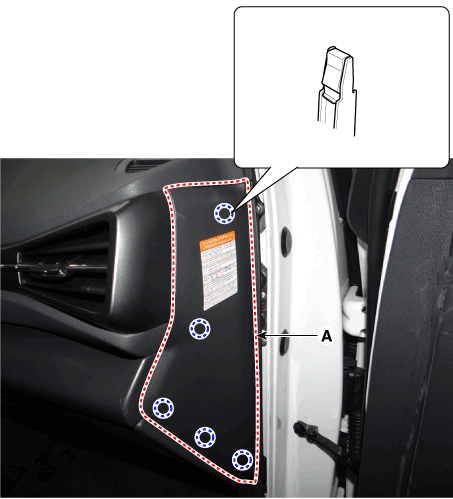
| 1. | Using a remover and remove the crash pad side cover [RH] (A).
|
| 2. | Remove the crash pad lower panel. (Refer to Crash Pad - "Crash Pad Lower Panel") |
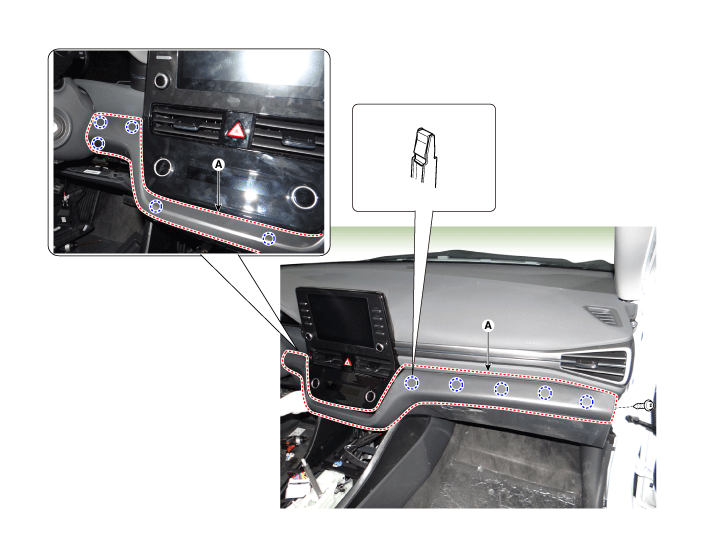
| 3. | Loosen the mounting screw and remove the crash pad center garnish (A).
|
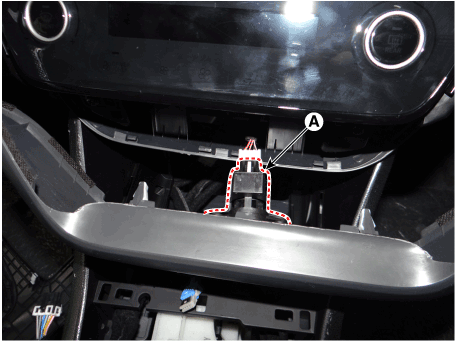
| 4. | Press the lock pin and separate the in-car sensor connector (A).
|
| 5. | To install, reverse the removal procedure.
|
Crash pad garnish [RH]
|
| 1. | Using a remover and remove the crash pad side cover [RH] (A).
|
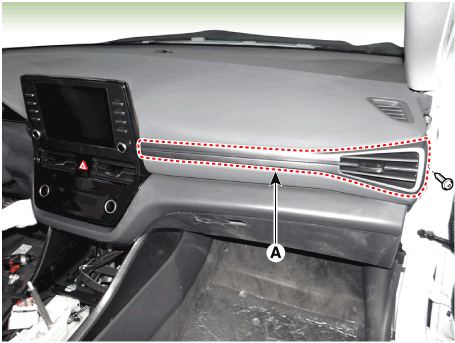
| 2. | Loosen the mounting screw and remove the crash pad garnish [RH] (A).
|
| 3. | To install, reverse the removal procedure.
|
Other information:
Hyundai Ioniq (AE) 2017-2025 Service Manual: Tailgate Weatherstrip. Repair procedures
Replacement1.Remove the tailgate weatherstrip (A). • Do not apply sealant to the body.2.To install, reverse the removal procedure. • When installing the tailgate weatherstrip, check the center-marking line (B)...
Hyundai Ioniq (AE) 2017-2025 Service Manual: Description and operation
DescriptionBlcok DiagramFunctions of Front View CameraFront View Camera supports the following functions using the information (lane, light source, vehicle and pedestrian) detected by the front view camera and the vehicle's signal information (CAN communication)...
Categories
- Manuals Home
- 1st Generation Ioniq Owners Manual
- 1st Generation Ioniq Service Manual
- Towing
- Hybrid battery SOC (State of Charge) gauge
- How to Disconnect Normal Charger
- New on site
- Most important about car
Seatback pocket
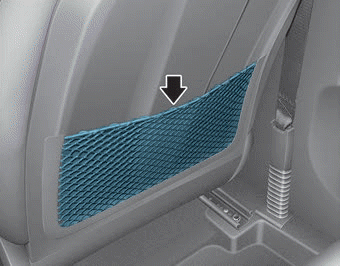
The seatback pocket is provided on the back of the front passenger's seatback.
WARNING
To prevent the Occupant Classification System from malfunctioning:
Copyright © 2025 www.hioniqae.com


