Hyundai Ioniq: Windshield Wiper/Washer / Rain Sensor. Repair procedures
| •
| The dust or foreign substance on the rain sensor have a bad effect upon the rain sensor capability,so protect the sensor surface with protection cover until installing the rain sensor to bracket for accurate funtion. |
| •
| The coupling pad on the rain sensor surface has adherive strength, so the coupling pad could stick to the windshield by environment condition during the using time. |
| •
| If separate it by force, it could be damaged. So make sure to separate the rain sensor from the windshield carefully. |
|
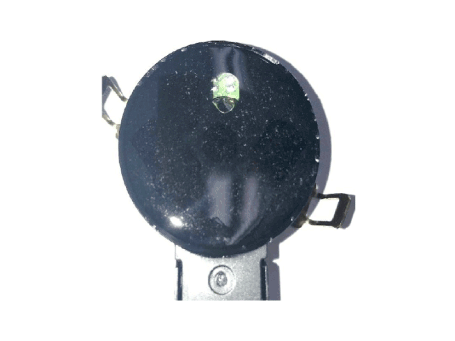
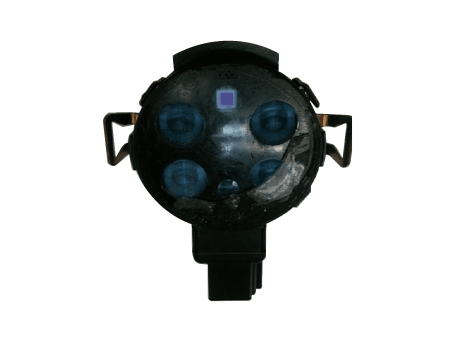
| 1. | Reomve the rain sensor cover (A). 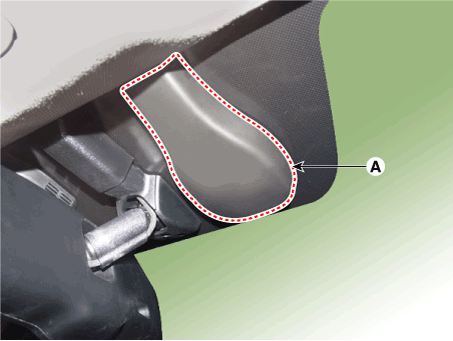
|
| 2. | Disconnect the wiring harness connector (A). 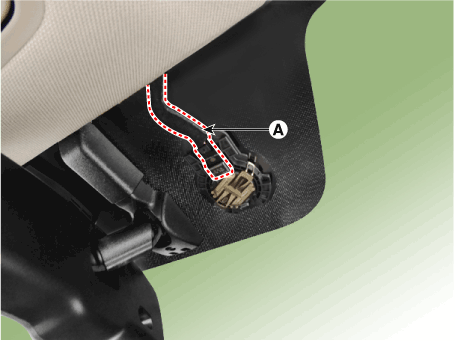
|
| 3. | Be careful not to damage the cover latch by applying excessive force. To remove the latch, pull aside the latch using the cover hole with a small flat - blade screwdriver (A). 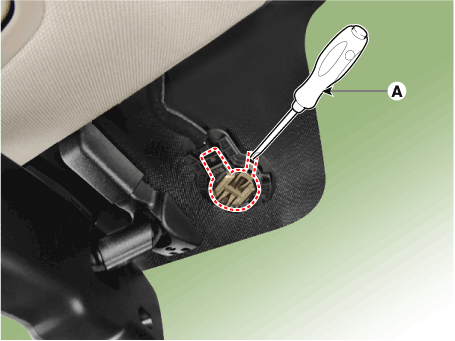
|
| 4. | Rain sensor module is attached to the front windshield by glue replacing the front windshield, remove the rain sensor module from the existing front windshield and install on the new front windshield. |
| •
| Check the operation of the rain sensor and the light sensor before mounting. |
| –
| Check the sensor for silicon damage. |
| –
| Check whether the rain sensor connector is tightened. |
| –
| Check whether the rain sensor and bracket are properly tightened. |
| –
| Check whether the sensor mounted area is free from foreign matters. |
| –
| Recalibrate sensitivity of the swtich if the auto-wiping operation is insensitivity or too much sensitive. 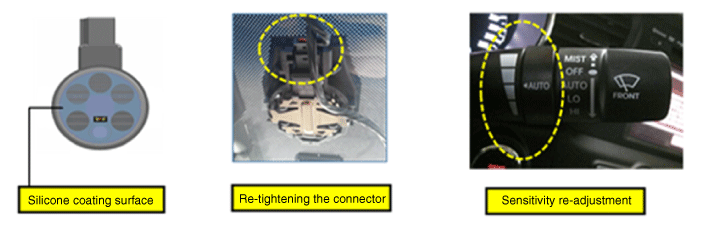
|
| •
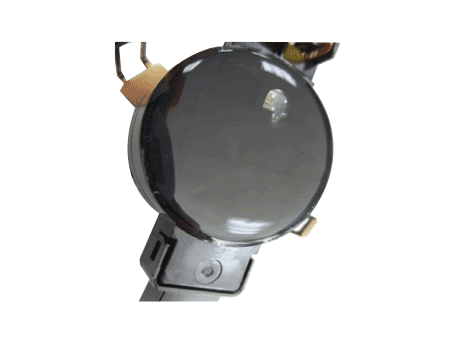
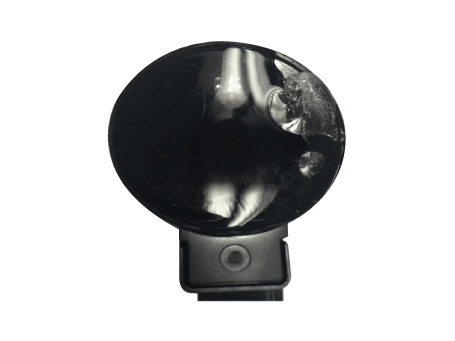
| In case the silicone of the rain sensor is normal or slightly damaged as shown in the below images, it can be reused.
Normal
| Damage within 1.5 mm of outer part
| 
| 
|
|
| •
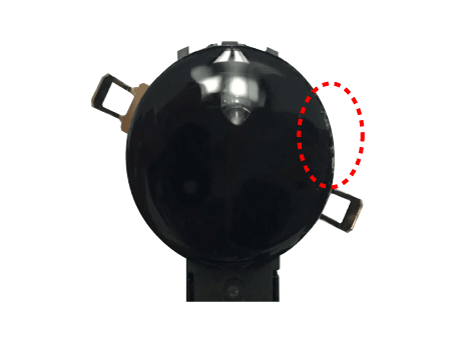
| In case the silicone of the rain sensor is damaged as shown in the below images, it should be replaced with a new silicone.
Foreign substances
| Fingerprint
| Damege
| 
| 
| 
|
|
| •
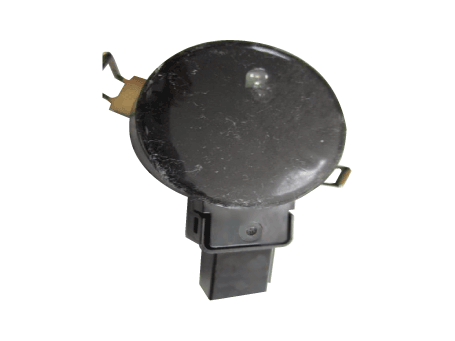
| In case the silicone of the rain sensor is damaged it should be replaced it as shown below. 1) Remove the damaged silicone gel pad from the lens plate completely. 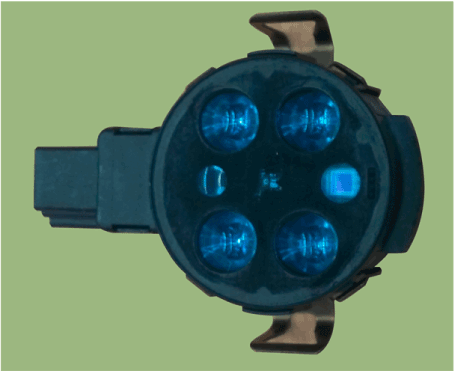
| •
| Be careful not to damage or contaminate the surface of the lens plate during removal. |
|
2) Attach the new silicone gel pad aftet removing the silicone paper (A) then remove the transperent film (B). 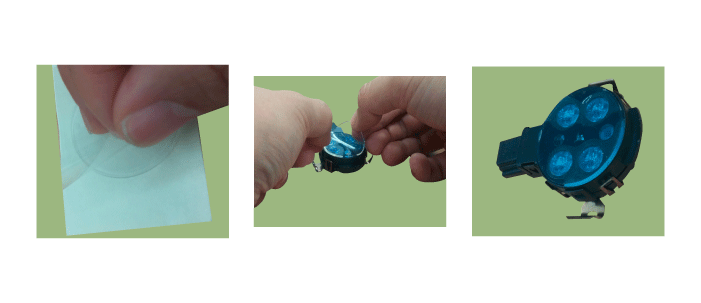
| •
| When attaching the silicone gel pad to the sensor, be careful not to contaminate |
|
|
| •
| It is very important that the silicon (coupling pad) is completely pushed against the windshield and stuck without any air bubble. 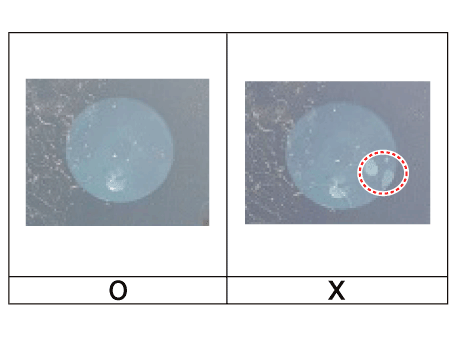
|
| •
| In case of replacing the damaged windshield, you may reuse the undamaged exisitng rain sensor. |
| •
| The windshield glass has to be clean and free of contamination or foreign substances. |
|
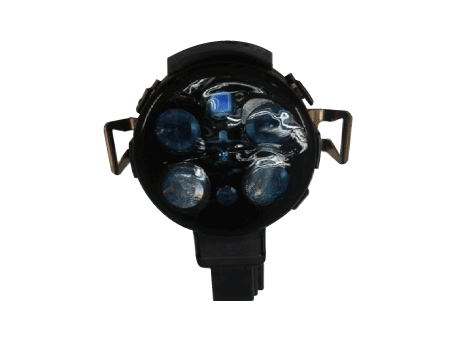
| 1. | Connect the rain sensor connector. |
| 2. | Push one of the latch of spring arm (A) down until it snaps and you hear a click sound. And then push the latch of second spring arm (B) for keeping the sensor in right position. 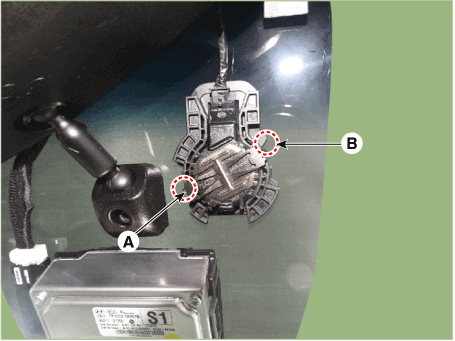
| •
| Do not snap both spring arms at the same time. |
| •
| An incorrectly mounted snap connection may cause malfunctions of the rain/light sensor. |
|
|
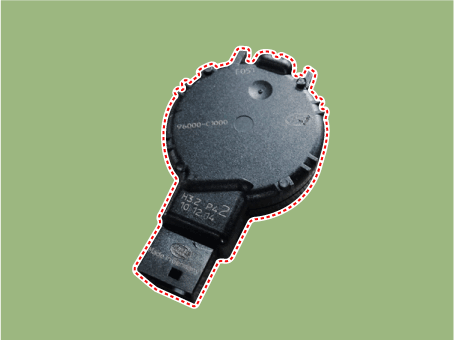
DescriptionIntegrated Rain SensorIntegrated rain sensor (A) controls three systems: front wiper, auto-light, and central air conditioner.1.Wiper Control SystemWhen "AUTO" switch signal is received from the multi-function switch on the right, the integrated rain sensor detects the amount of rainfall...
Other information:
Your vehicle is equipped with a side air bag in each front seat. The purpose
of the air bag is to provide the vehicle's driver and the front passenger with additional
protection than that offered by the seat belt alone.
The side air bags are designed to deploy only during certain side impact collisions,
depending on the crash severity...
Removal1.Disconnect the negative (-) battery terminal.2.Remove the front view camera cover (A).3.Disconnect the front view camera connector (A).4.Remove the front view camera after disengaging the mounting bracket (A).Installation1.Align front view camera with windshield bracket using forward edge point (A)...
Categories
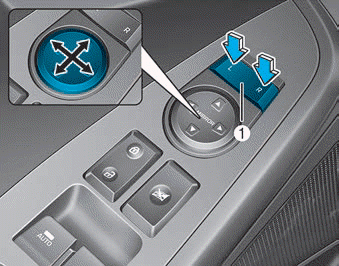
Adjusting the side mirrors:
1. Press either the L (driver's side) or R (passenger's side) button (1) to select
the side view mirror you would like to adjust.
read more


 Rain Sensor. Description and operation