Hyundai Ioniq: Rear Door / Rear Door Side Weatherstrip. Repair procedures
Hyundai Ioniq (AE) 2017-2025 Service Manual / Body (Interior and Exterior) / Rear Door / Rear Door Side Weatherstrip. Repair procedures
| Replacement |
| [Rear door side weatherstrip] |
| 1. | Loosen the rear door checker (B) mounting bolt.
|
| 2. | Detach the clips, remove the rear door side weatherstrip (A).
|
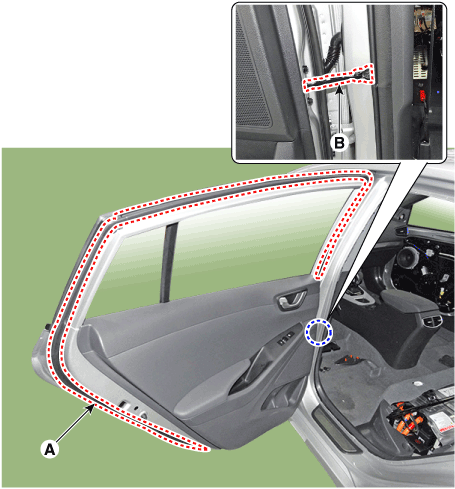
| 3. | To install, reverse the removal procedure.
|

| [Front door body side weatherstrip] |
| 4. | Detach the clips, then remove the front door body side weatherstrip (A).
|
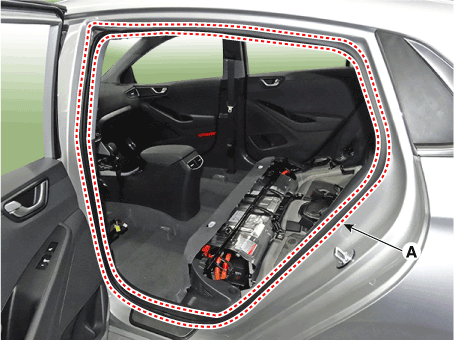
| 5. | To install, reverse the removal procedure.
|
 Rear Door Belt Inside Weatherstrip. Repair procedures
Replacement1.Remove the rear door trim.(Refer to Rear Door - "Rear Door Trim")2.Remove the rear door belt inside weatherstrip (A).3.To install, reverse the removal procedure...

Other information:
Hyundai Ioniq (AE) 2017-2025 Owner's Manual: Lighting control
To operate the lights, turn the knob at the end of the control lever to one of the following positions: 1. DRL (Daytime Running Lights) OFF position 2. AUTO light position 3. Parking lamp position 4. Headlamp position Daytime running light (DRL) (if equipped) The Daytime Running Lights (DRL) can make it easier for others to see the front of your vehicle during the day, especially after dawn and before sunset...
Hyundai Ioniq (AE) 2017-2025 Service Manual: Oil Level Gauge & Pipe. Repair procedures
R..
Categories
- Manuals Home
- 1st Generation Ioniq Owners Manual
- 1st Generation Ioniq Service Manual
- Check Hybrid system, Check Hybrid system. Turn engine Off
- Temperature control
- High Beam Assist (HBA)
- New on site
- Most important about car
Driver Position Memory System
The Driver Position Memory System is provided to store and recall the following memory settings with a simple button operation.
- Driver's seat position
- Side view mirror position
- Instrument panel illumination intensity

Copyright © 2025 www.hioniqae.com