Hyundai Ioniq: Intake and Exhaust System / Exhaust Manifold. Repair procedures
Hyundai Ioniq (AE) 2017-2025 Service Manual / Engine Mechanical System / Intake and Exhaust System / Exhaust Manifold. Repair procedures
| Removal and Installation |
| 1. | Disconnect the battery negative terminal. |
| 2. | Remove the air cleaner assembly. (Refer to Intake and Exhaust System - "Air Cleaner") |
| 3. | Remove the engine room under cover. (Refer to Engine and Transaxle Assembly - "Engine Room Under Cover") |
| 4. | Remove the front muffler. (Refer to Intake and Exhaust System - "Muffler") |
| 5. | Remove the engine mounting support bracket. (Refer to Engine and Transaxle Assembly - "Engine Mounting") |
| 6. | Disconnect the oxygen sensor connector (A) from the connector bracket and then remove the heat protector (B).
|
| 7. | Remove the exhaust manifold stay (A).
|
| 8. | Remove the EGR cooler pipe A bolts (A).
|
| 9. | Remove the exhaust manifold (A).
|
| 10. | Remove the exhaust manifold gasket (A).
|
| 11. | Install in the reverse order of removal. |
Other information:
Hyundai Ioniq (AE) 2017-2025 Service Manual: Description and operation
Description• Components location : DCT (Dual Clutch Transmission)• Function The dual clutch is installed within the transmission. The dual clutch is comprised of an odd clutch and an even clutch...
Hyundai Ioniq (AE) 2017-2025 Service Manual: Specifications
S..
Categories
- Manuals Home
- 1st Generation Ioniq Owners Manual
- 1st Generation Ioniq Service Manual
- Child-Protector Rear Door Locks
- Coasting Guide (Plug-in hybrid vehicle)
- Tilt Steering / Telescope Steering
- New on site
- Most important about car
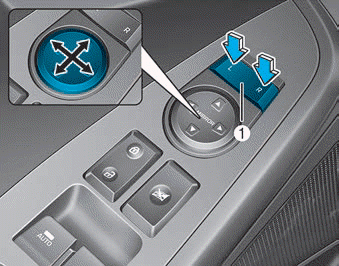
Side view mirror control

Adjusting the side mirrors:
1. Press either the L (driver's side) or R (passenger's side) button (1) to select the side view mirror you would like to adjust.
Copyright © 2025 www.hioniqae.com


