Hyundai Ioniq: Rear Suspension System / Rear Assist Arm. Repair procedures
Hyundai Ioniq (AE) 2017-2025 Service Manual / Suspension System / Rear Suspension System / Rear Assist Arm. Repair procedures
| Removal |
| 1. | Loosen the wheel nuts slightly. Raise the vehicle, and make sure it is securely supported. |
| 2. | Remove the rear wheel and tire (A) from the rear hub.
|
| 3. | Loosen the bolt and then remove the assist arm (A) from the rear axle.
|
| 4. | Loosen the bolt & nut and then remove the rear assist arm (A) with the rear cross member.
|
| 5. | Install in the reverse order of removal. |
| 6. | Check the alignment. (Refer to Tires/Wheels - "Alignment") |
| Inspection |
| 1. | Check the bushing for wear and deterioration. |
| 2. | Check the rear lower arm for deformation.. |
| 3. | Check the coil spring and spring pad for deterioration and deformation. |
| 4. | Check for all bolts and nut. |
 Rear Stabilizer Bar. Repair procedures
Removal1.Loosen the wheel nuts slightly.Raise the vehicle, and make sure it is securely supported.2.Remove the rear wheel and tire (A) from the rear hub...
 Trailing Arm. Repair procedures
Removal1.Loosen the wheel nuts slightly.Raise the vehicle, and make sure it is securely supported.2.Remove the rear wheel and tire (A) from the rear hub...
Other information:
Hyundai Ioniq (AE) 2017-2025 Service Manual: Troubleshooting
Troubleshooting Symptom Possible cause Remedy Hard steeringImproper front wheel alignmentExcessive turning resistance of lower arm ball jointLow tire pressureNo power assistCorrectReplaceAdjustRepair and replacePoor return of steering wheel to centerImproper front wheel alignmentCorrectPoor or rough rideImproper front wheel alignmentMalfunctioning shock absorberBroken or worn stabilizerBroken or worn coil springWorn lower arm bushingCorrectRepair or replaceReplaceReplaceReplace the lower arm assemblyAbnormal tire wearImproper front wheel alignmentImproper tire pressureMalfunctioning shock absorberCorrectAdjust or replaceReplaceWanderingImproper front wheel alignmentPoor turning resistance of lower arm ball jointLoose or worn lower arm bushingCorrectRepairRetighten or replaceVehicle pulls to one sideImproper front wheel alignmentExcessive turning resistance of lower arm ball jointBroken or worn coil springBent lower armCorrectReplaceReplaceRepairSteering wheel shimmyImproper front wheel alignmentPoor turning resistance of lower arm ball jointBroken or worn stabilizerWorn lower arm bushingMalfunctioning shock absorberBroken or worn coil springCorrectReplaceReplaceReplaceReplaceReplaceBottomingBroken or worn coil springMalfunctioning shock absorberReplaceReplaceWheel /tire noise, vibration and harshness concerns are directly related to vehicle speed and are not generally affected by acceleration, coasting or decelerating...
Hyundai Ioniq (AE) 2017-2025 Service Manual: Front View Camera Unit. Repair procedures
Removal1.Disconnect the negative (-) battery terminal.2.Remove the front view camera cover (A).3.Disconnect the front view camera connector (A).4.Remove the front view camera after disengaging the mounting bracket (A).Installation1.Align front view camera with windshield bracket using forward edge point (A)...
Categories
- Manuals Home
- 1st Generation Ioniq Owners Manual
- 1st Generation Ioniq Service Manual
- Reverse Parking Aid Function
- Check Hybrid system, Check Hybrid system. Turn engine Off
- Checking the Coolant Level
- New on site
- Most important about car
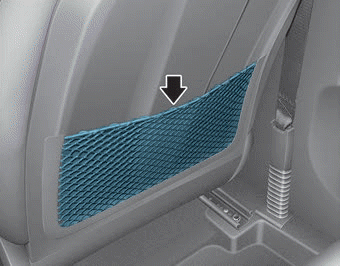
Seatback pocket

The seatback pocket is provided on the back of the front passenger's seatback.
WARNING
To prevent the Occupant Classification System from malfunctioning:
Copyright © 2025 www.hioniqae.com


